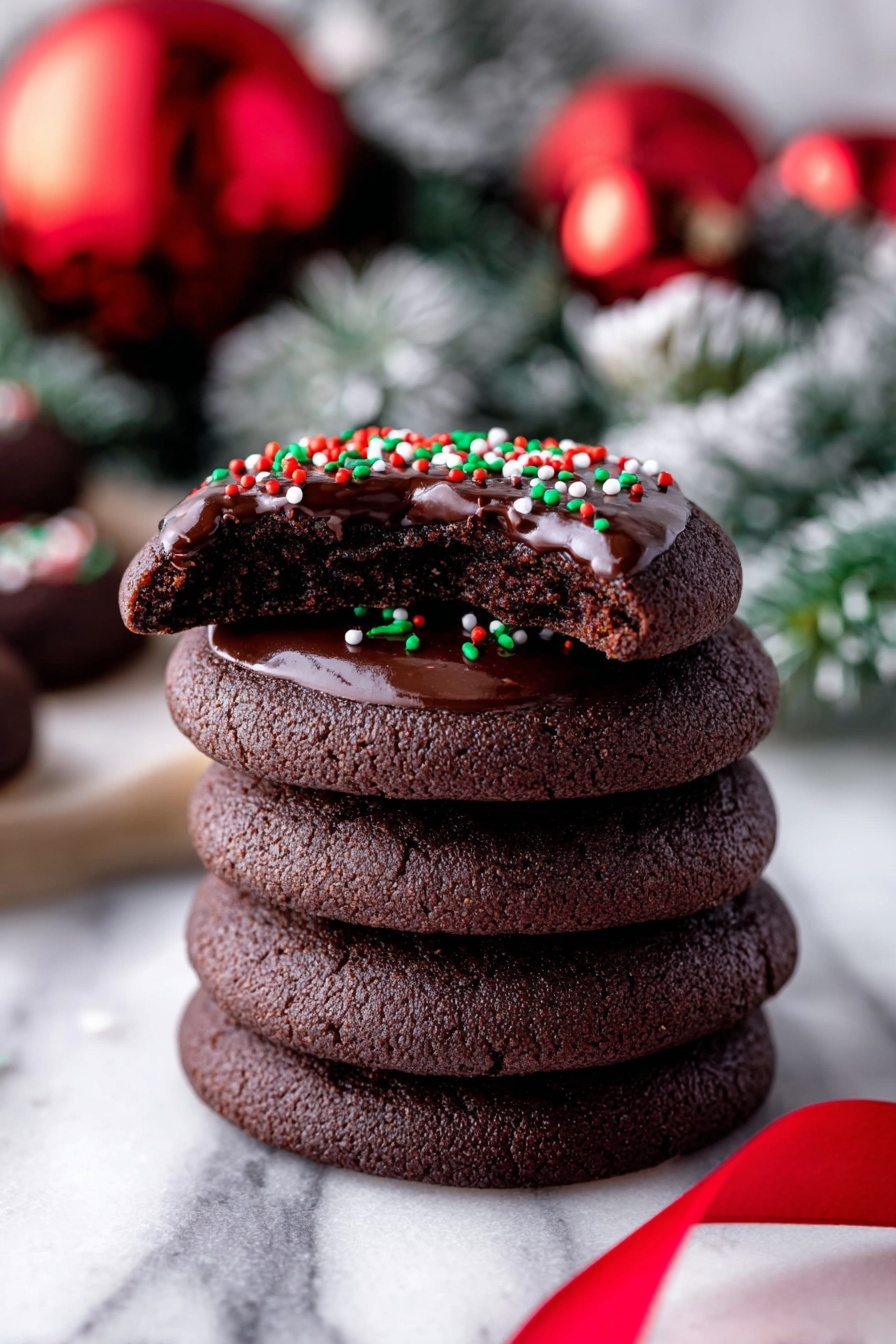
There’s something utterly comforting in these little pockets of chocolate bliss. This Chocolate Thumbprint Cookies with Ganache Recipe brings together a tender, cocoa-rich cookie base with a luscious, shiny ganache center — a perfect bite every single time. You're going to love making these as much as eating them!

Jump to:
- Why You'll Love This Recipe
- Ingredients & Why They Work
- Make It Your Way
- Step-by-Step: How I Make Chocolate Thumbprint Cookies with Ganache Recipe
- Top Tip
- How to Serve Chocolate Thumbprint Cookies with Ganache Recipe
- Make Ahead and Storage
- Frequently Asked Questions:
- Final Thoughts
- Chocolate Thumbprint Cookies with Ganache Recipe
Why You'll Love This Recipe
I remember the first time I pulled these cookies out of the oven—just that smell of cocoa and brown sugar mixing in the kitchen made me think, "This is pure happiness." The way the chewy cookie embraces silky ganache is truly something special, and it's surprisingly simple to pull off.
- Perfect Texture: The cookies are tender but not crumbly, with a soft center that melts in your mouth.
- Rich Ganache Filling: Using a smooth chocolate ganache instead of jam or jelly makes these feel extra indulgent.
- Chill and Bake Technique: Chilling the dough is a game changer—it helps maintain those perfect thumbprint indents during baking.
- Great for Gifting or Parties: These cookies hold up well, look beautiful, and taste like you put in way more effort than you actually did.
Ingredients & Why They Work
This recipe balances cozy, familiar cookie ingredients with a few special touches that elevate the flavor. The Dutch-process cocoa powder brings a deeper chocolate flavor, and the brown sugar adds that moist chewiness that I look for in a cookie. Let me tell you why each is crucial:
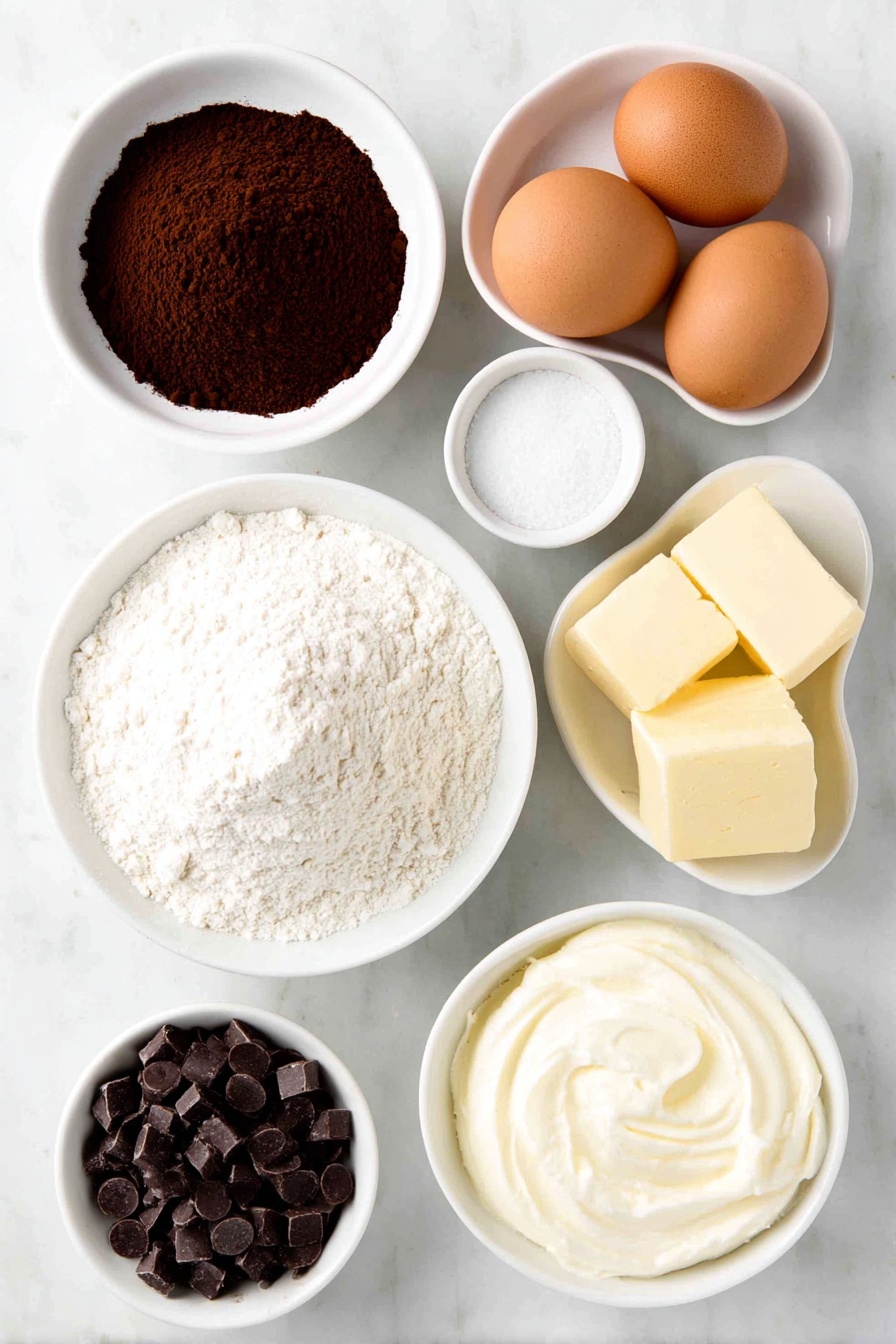
- All-purpose flour: Spooned and leveled to avoid dense dough, giving these cookies a tender crumb.
- Dutch-process cocoa powder: Adds rich, mellow chocolate notes without bitterness—trust me, it’s worth seeking out.
- Salt: Just a touch to balance sweetness and sharpen all those chocolate flavors.
- Baking powder: Gives a slight lift so the cookies aren’t too flat or dense.
- Unsalted butter: Softened for creaming, it creates that wonderfully tender texture and buttery taste.
- Light brown sugar: Packed for moisture and that caramel-like depth which makes cookies chewy and flavorful.
- Granulated white sugar: Adds subtle crispiness around the edges without overpowering sweetness.
- Egg yolks: Using yolks only keeps the cookies rich and adds tenderness without over-drying.
- Vanilla bean paste or extract: A little aroma booster that complements the chocolate perfectly.
- Semi-sweet chocolate chips: For the ganache, they melt smoothly creating a creamy center.
- Heavy whipping cream: Mixed with chocolate chips to make that silky ganache you’ll want to spoon onto everything.
- Nonpareils (optional): For a festive sprinkle that adds a bit of crunch and visual fun.
Make It Your Way
One of my favorite things about this Chocolate Thumbprint Cookies with Ganache Recipe is how easy it is to tweak based on what you like or what you have on hand. Don’t hesitate to make it your own—after all, baking’s about creativity, too!
- Variation: Sometimes I swap the semi-sweet chips for dark chocolate, which gives a richer ganache with a slight bitterness that balances perfectly with the sweetness of the cookie.
- Dietary tweak: You can try swapping all-purpose flour for a gluten-free blend, but keep in mind texture might be slightly different. Chilling the dough a little longer helps manage this.
- Seasonal flavor twist: Adding a pinch of cinnamon or a dash of espresso powder to the dough makes these cookies feel cozy and warm—perfect for holiday baking.
Step-by-Step: How I Make Chocolate Thumbprint Cookies with Ganache Recipe
Step 1: Mixing the Magic
Start by whisking together the flour, cocoa powder, salt, and baking powder in a medium bowl. I find this makes sure everything is evenly distributed—a key step to avoid any patchy cocoa bits in your cookies.
Step 2: Creaming Butter and Sugars
In a large bowl, beat the softened butter with both sugars until the mixture is pale, light, and fluffy—about two minutes. The creaming technique is super important for that melt-in-your-mouth texture, so don’t rush it!
Step 3: Incorporate Egg Yolks and Vanilla
Add in the egg yolks and vanilla bean paste/extract. Beat them through until the mix becomes even lighter—this helps the cookies have a nice rise and softness.
Step 4: Bringing It All Together
Gently fold in the dry ingredients until just combined. Don’t overmix here—you want to keep things tender, which means just enough to pull the dough together.
Step 5: Shaping the Cookies
Scoop the dough into roughly 1-tablespoon portions and roll into balls. Then, press down lightly in the center of each ball using a ¼ teaspoon measuring spoon to create that perfect thumbprint indent. Pro tip: chilling these dough balls for at least an hour is a must to prevent them from spreading and losing shape during baking.
Step 6: Baking to Perfection
Preheat your oven to 350°F (175°C). Arrange cookies spaced about 1½ inches apart to give them room to puff and settle. Bake for 9 to 11 minutes — I’ve found 10 minutes gives the best texture. When out of the oven, gently press the thumbprints again to restore any lost indent, and use a small cookie cutter to neaten the edges while they’re still warm.
Step 7: Making That Heavenly Ganache
Place semi-sweet chocolate chips in a bowl. Heat heavy cream until just about boiling, then pour over the chocolate chips. Let rest for a minute, then stir until silky smooth and glossy. I love how this ganache is easy to make but tastes like a decadent dessert topping.
Step 8: Assembling the Cookies
Fill each cookie’s thumbprint with about 1 teaspoon of ganache—more if your indent is roomy! If you like extra fun, sprinkle some nonpareils on top. Pop the cookies in the fridge for 10–15 minutes to let the ganache set perfectly before serving.
Top Tip
I’ve baked these cookies dozens of times, and what really helped me nail consistent results was paying close attention to chilling the dough and making those thumbprints just right before baking. Those little steps make all the difference between a good cookie and an unforgettable one.
- Chilling is Key: Don’t skip refrigerating the shaped dough. It prevents spreading and keeps your cookies perfectly shaped.
- Press Indents Twice: Press the thumbprints before baking and again while the cookies are warm. This ensures a deep well, perfect for holding ganache.
- Use Quality Chocolate: The ganache shines when made with good semi-sweet chocolate chips — it’s worth the upgrade!
- Don’t Overbake: Watch the time closely — your cookies should still look slightly soft when you pull them from the oven. They’ll firm up as they cool.
How to Serve Chocolate Thumbprint Cookies with Ganache Recipe

Garnishes
I usually stick to classic nonpareils or a light dusting of cocoa powder on the ganache to keep things elegant. Sometimes I add a couple flakes of flaky sea salt on top—it contrasts beautifully with the rich chocolate and gives an adult spin on this sweet treat.
Side Dishes
These cookies pair wonderfully with a cold glass of milk, rich espresso, or even a cup of hot herbal tea. For holiday gatherings, I love placing them alongside a cheese board with nuts and fresh berries for a special dessert spread.
Creative Ways to Present
For birthdays or festive occasions, I arrange these cookies on a tiered stand with colorful sprinkles or edible glitter sprinkled on top. Wrapping a few in clear cellophane tied with a ribbon makes a heartfelt homemade gift that always gets compliments.
Make Ahead and Storage
Storing Leftovers
I keep these cookies in an airtight container at room temperature or in the fridge if my kitchen’s warm. They stay fresh and soft for up to three days—though, honestly, they rarely last that long around here!
Freezing
You can freeze baked cookies without ganache for up to a month in an airtight container. When ready to enjoy, thaw at room temperature and add ganache before serving for that freshly made feel. Ganache-filled cookies don’t freeze as well because the cream can separate.
Reheating
If you want to warm up leftover cookies, especially on a chilly day, pop them in a low oven (around 300°F) for 5 minutes or so. It revives that just-baked softness. Avoid the microwave as it can make the ganache too soft or oily.
Frequently Asked Questions:
Yes, you can use natural cocoa powder, but the flavor will be slightly more acidic and less smooth than Dutch-process. Adjust baking soda instead of baking powder if you want to balance acidity, or just embrace the different but still delicious flavor.
Chilling the dough balls for at least an hour before baking is essential. Also, pressing the indentation gently again as soon as they come out of the oven helps keep its shape intact. Using a small spoon or the back of a teaspoon to create a nice well works well too.
Absolutely! You can prepare the ganache a day ahead and store it covered in the fridge. When ready, gently warm it until it's pourable to fill your cookies. Just be sure not to overheat, or the ganache may separate.
Store the assembled cookies in an airtight container in the fridge to keep the ganache firm. Take them out about 10 minutes before serving so they soften slightly and release all their chocolatey aroma.
Final Thoughts
This Chocolate Thumbprint Cookies with Ganache Recipe is genuinely a go-to favorite in my kitchen. They’re as enjoyable to make as they are to share, and honestly, pulling them out of the fridge after chilling is one of life’s simple pleasures. I hope you’ll love these cookies as much as I do—baking them might just become your next happy ritual!
Print
Chocolate Thumbprint Cookies with Ganache Recipe
- Prep Time: 15 minutes
- Cook Time: 11 minutes
- Total Time: 1 hour 26 minutes
- Yield: 34 cookies
- Category: Dessert
- Method: Baking
- Cuisine: American
- Diet: Vegetarian
Description
Delight in these rich and tender Chocolate Thumbprint Cookies, filled with smooth chocolate ganache. Perfectly balanced with a hint of cocoa in the cookie and a luscious creamy center, these cookies make for an irresistible treat that’s ideal for any occasion or chocolate lover.
Ingredients
For the Chocolate Thumbprint Cookies
- 1 ½ cups (188 g) all-purpose flour, spooned and leveled
- ½ cup (40 g) cocoa powder, Dutch process
- ½ teaspoon salt
- ½ teaspoon baking powder
- ¾ cup (168 g) unsalted butter, softened
- ¾ cup (165 g) light brown sugar, packed
- ¼ cup (50 g) granulated white sugar
- 2 egg yolks, at room temperature
- 1 ½ teaspoon vanilla bean paste or extract
For the Chocolate Ganache
- 1 cup (200 g) semi-sweet chocolate chips
- ½ cup (120 ml) heavy whipping cream
- nonpareils for sprinkling on top, optional
Instructions
- Prepare Dry Ingredients: In a medium bowl, whisk together all-purpose flour, cocoa powder, salt, and baking powder until well combined. Set aside.
- Cream Butter and Sugars: In a large bowl, use an electric mixer to cream the softened butter, brown sugar, and granulated sugar together for about two minutes until light and fluffy.
- Add Egg Yolks and Vanilla: Mix in the egg yolks and vanilla bean paste or extract until the mixture is pale and fluffy, approximately 1 to 2 minutes.
- Combine Dry and Wet Ingredients: Slowly add the dry ingredient mixture to the wet ingredients and mix just until combined; avoid overmixing to keep cookies tender.
- Form Dough Balls: Scoop the dough into 34 equal portions (roughly 1 tablespoon each) and roll each into a ball. Place them spaced evenly on prepared baking sheets lined with parchment paper.
- Create Indents: Using a ¼ teaspoon measure, gently press down on each dough ball to create an indent for the ganache filling.
- Chill Dough: Chill the indented dough balls for at least 1 hour in the refrigerator to help them hold their shape during baking.
- Preheat Oven: When ready to bake, preheat the oven to 350 degrees Fahrenheit.
- Bake Cookies: Arrange dough balls about 1 ½ inches apart on baking sheets and bake for 11 minutes. (10 minutes works perfectly for a slightly softer cookie.)
- Refine Indents: Right after baking, gently press down the centers again with a ¼ teaspoon. Use a circular cookie cutter to reshape the cookies while still warm, restoring their perfect shape and size.
- Cool Cookies: Let cookies cool on the baking sheet for 5 minutes before transferring them to a wire rack to cool completely.
- Make Ganache: Place semi-sweet chocolate chips in a small bowl. Heat the heavy cream until just boiling, then pour it over the chocolate and let sit for 1 minute to soften.
- Stir Ganache: Stir the chocolate and cream until smooth and fully combined, creating a glossy ganache.
- Fill Cookies: Spoon about 1 teaspoon of ganache into each cookie indent. Add extra if there’s room.
- Decorate: Optionally, sprinkle nonpareils or other decorations on top of the ganache.
- Set Ganache: Chill the filled cookies in the refrigerator for 10 to 15 minutes to allow the ganache to set firmly.
- Store Cookies: Store any leftovers in an airtight container at room temperature for up to three days to maintain freshness.
Notes
- Measure your flour properly by spooning it into your measuring cup and leveling it, or better yet, weigh it for accuracy (1 cup = 125 grams) to avoid dense cookies.
- Chilling the dough is essential to help retain the shape and create perfect indents in the cookies.
- If you don't have vanilla bean paste, pure vanilla extract works just as well.
- The cocoa powder should be Dutch process for a richer chocolate flavor and darker color.
- You can substitute semi-sweet chocolate chips with dark or milk chocolate based on preference.
- Nonpareils or sprinkles are optional but add a fun decorative touch.
- Use parchment paper on baking sheets to prevent cookies from sticking and ensure even baking.
Nutrition
- Serving Size: 1 cookie
- Calories: 160 kcal
- Sugar: 12 g
- Sodium: 80 mg
- Fat: 10 g
- Saturated Fat: 6 g
- Unsaturated Fat: 3 g
- Trans Fat: 0 g
- Carbohydrates: 18 g
- Fiber: 2 g
- Protein: 2 g
- Cholesterol: 30 mg


Leave a Reply