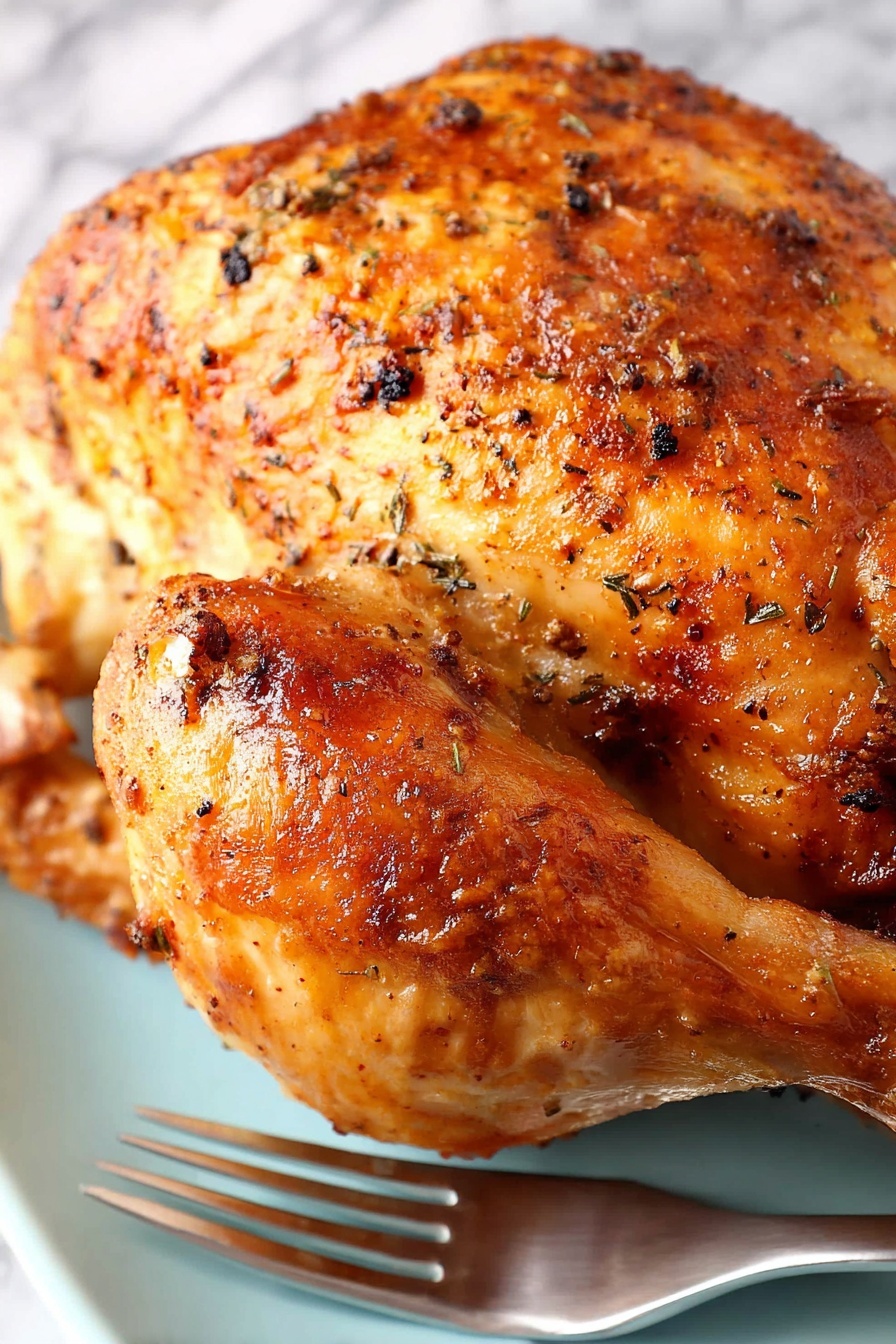
There’s just something magical about perfectly cooked poultry with that irresistible golden crunch on the outside. This Instant Pot Turkey Breast with Crispy Skin Recipe brings all that magic together quickly and easily—juicy meat inside, and crisp, flavorful skin you’ll want to savor.

Jump to:
- Why You'll Love This Recipe
- Ingredients & Why They Work
- Make It Your Way
- Step-by-Step: How I Make Instant Pot Turkey Breast with Crispy Skin Recipe
- Top Tip
- How to Serve Instant Pot Turkey Breast with Crispy Skin Recipe
- Make Ahead and Storage
- Frequently Asked Questions:
- Final Thoughts
- Instant Pot Turkey Breast with Crispy Skin Recipe
Why You'll Love This Recipe
This Instant Pot Turkey Breast with Crispy Skin Recipe is a total game-changer, especially if you want a quick, fuss-free way to enjoy turkey without the long roasting times. I’ve done many turkey recipes over the years, but pressure cooking in the Instant Pot locks in so much flavor and moisture. Then finishing the skin under the broiler? It’s the perfect combo of ease and gourmet results.
- Time-Saving Wonder: Turkey usually screams “all day in the oven,” but here you get dinner on the table much faster without sacrificing flavor or juiciness.
- Crispy Skin Magic: The trick of pressure cooking then broiling gives you that sought-after crunchy skin that’s often missing from Instant Pot recipes.
- Simple but Flavor-Packed: The blend of fresh herbs, paprika, and garlic complements the turkey perfectly without overwhelming it.
- Versatile Leftovers: The rich broth leftover is a fantastic bonus for soups or gravies, so nothing goes to waste.
Ingredients & Why They Work
The ingredients here are straightforward and work together to maximize the turkey's natural flavor. Using a bone-in, skin-on turkey breast really locks in moisture and develops that flavorful crust. Fresh herbs and paprika add an earthy, warm aroma that pairs beautifully with garlic and onion. The chicken broth steams the bird gently, keeping it tender.

- Bone-in Skin-on Turkey Breast: Bone adds flavor and moisture, skin is essential for that crispy finish.
- Olive Oil: Helps crisp the skin when broiled and carries the herbs’ flavors.
- Paprika: Adds warmth and a subtle smoky note, plus beautiful color on the skin.
- Fresh Herb Mix (Rosemary, Sage, Thyme): Classic poultry herbs that create an herbaceous, comforting flavor.
- Salt & Black Pepper: Essential seasoning to enhance natural flavors and create crispy skin texture.
- Chicken Broth: Provides moisture for pressure cooking and imparts savory depth.
- Onion, Garlic, Celery: Aromatics that infuse the turkey as it cooks, adding complexity to the broth.
Make It Your Way
I like to keep it pretty classic here, but don’t hesitate to tweak the herb mix to your liking! Sometimes I add a pinch of cayenne for a gentle kick, or swap rosemary for fresh oregano if I’m feeling Mediterranean vibes. Playing with the side dishes can also completely change the mood of this dish, so go ahead and make it yours.
- Variation: I once tried adding a splash of white wine to the broth for extra depth— it created a lovely subtle tang that my family loved.
- Herb Adjustments: Substitute fresh thyme for dried if that’s what you have—it works just fine and may even make your pantry simpler!
- Lower Sodium Version: Use low-sodium chicken broth and reduce added salt, then enhance flavor with lemon zest or garlic powder.
Step-by-Step: How I Make Instant Pot Turkey Breast with Crispy Skin Recipe
Step 1: Prep the Aromatics and Broth
Start by pouring 2 cups of chicken broth into your Instant Pot insert. Add the large sliced onions, whole garlic cloves, and celery stalks to the broth—they create that amazing aromatic steam that flavors the turkey while it cooks. I always try to chop the onions into generous slices so they don’t burn or disintegrate during pressure cooking.
Step 2: Season the Turkey Breast
In a small bowl, whisk together olive oil, paprika, fresh herb mix, salt, and black pepper. Give your turkey breast a quick rinse and pat it completely dry—this step is key to getting crispy skin later! Brush the oil mixture all over, making sure to coat the skin evenly. The oil and spices create that beautiful golden color and flavor during broiling.
Step 3: Pressure Cook the Turkey
Place the trivet inside the Instant Pot and set your turkey breast on top, breast side up. Lock the lid, seal the valve, and set to manual high pressure for 35 minutes (for a 7-pound turkey breast). One thing I’ve learned — resist the urge to rush the natural pressure release after cooking. Letting it release naturally keeps the meat incredibly juicy.
Step 4: Crisp The Skin Under the Broiler
Once pressure is fully released, carefully remove the lid and take out the turkey onto a baking sheet or large platter. Preheat your broiler to about 440 °F and pop the turkey in, watching closely as the skin crisps and turns golden. Rotate the pan as needed—this step usually takes just a few minutes, so stay nearby to avoid burning. This finishing touch really elevates the dish.
Step 5: Make the Gravy
Don’t toss that flavorful cooking liquid! Drain it through a sieve to strain out the onions and garlic—press gently to extract every bit of deliciousness. Measure out 2 cups of this broth back into your Instant Pot. Whisk in a mixture of cornstarch and cold water, then use the sauté function to thicken it into the perfect gravy. It’s rich and hits all the comfort notes.
Top Tip
After making this Instant Pot Turkey Breast with Crispy Skin Recipe multiple times, I picked up a few tricks that make all the difference between a good turkey and a truly memorable one. These tips helped me avoid dry meat and underwhelming skin, so I’m happy to share them to save you those headaches!
- Pat Skin Dry Thoroughly: Moisture is the enemy of crispy skin—so always dry your turkey breast well before oiling and seasoning.
- Don’t Skip Natural Pressure Release: It allows the juices to redistribute, making your turkey tender and moist.
- Broil Close But Watch Closely: Skin crisps fast under the broiler, so stay close and rotate to avoid burning.
- Save That Broth: The leftover liquid is gold for gravy, so don’t toss it—freeze it if you can’t use it right away.
How to Serve Instant Pot Turkey Breast with Crispy Skin Recipe

Garnishes
I like to keep garnishes simple—fresh thyme sprigs or a sprinkle of chopped parsley really brighten up the plate and look pretty against that golden skin. A few lemon wedges on the side add a lovely fresh zing just before serving.
Side Dishes
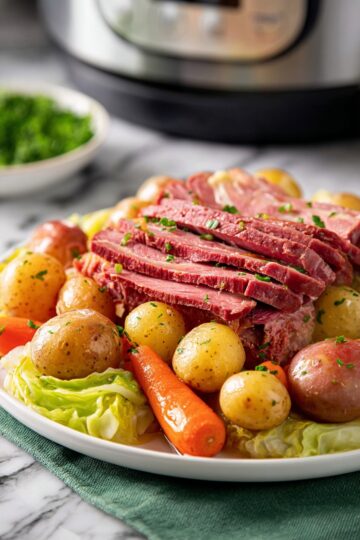
This turkey pairs amazingly with buttery mashed potatoes and roasted root vegetables. Sometimes I serve it alongside creamy green bean casserole or a classic cranberry sauce to round out the plate.
Creative Ways to Present
For special occasions, I love carving the turkey breast into thick slices and fanning them out on a wooden board with bowls of gravy, cranberry sauce, and fresh herbs for a beautiful family-style spread. It feels cozy and elevated at the same time.
Make Ahead and Storage
Storing Leftovers
Once cooled, I wrap leftover turkey tightly in foil then place it in an airtight container in the fridge. It keeps beautifully for up to 4 days. I usually slice it thinly to toss in sandwiches or salads during the week.
Freezing
I freeze carved turkey breast in freezer-safe bags, portioned for easy thawing. Just be sure to remove as much air as possible to preserve texture and flavor. When frozen properly, it holds up nicely for up to 3 months.
Reheating
To reheat, I prefer low and slow — gently warm slices in a covered skillet over medium-low heat with a splash of broth to keep it moist. Microwaving works in a pinch, but watch carefully to avoid drying it out.
Frequently Asked Questions:
You can, but cooking times will be shorter. Start checking your turkey at around 25 minutes under high pressure. Bone-in turkey tends to stay juicier during pressure cooking, so if you go boneless, watch it closely to avoid overcooking.
Use a reliable digital meat thermometer to check the internal temperature at the thickest part of the breast—it should read at least 165°F. This is the safest and most accurate way to ensure your turkey is cooked through but still juicy.
Since pressure cooking steams the turkey, the skin won’t get crispy in the pot. The secret is finishing the turkey under the broiler for a few minutes after cooking, watching closely to achieve that perfect golden and crackly skin without burning.
Absolutely! You can pressure cook and broil the turkey breast in advance, then refrigerate it. Reheat gently before serving with freshly made gravy for a quick, stress-free meal. This is especially handy for holiday gatherings.
Final Thoughts
This Instant Pot Turkey Breast with Crispy Skin Recipe is my go-to whenever I want classic turkey flavor without the all-day wait. It strikes that perfect balance of juicy, tender meat with show-stopping crispy skin that really impresses without any stress. Give it a try—you’ll probably find yourself reaching for the Instant Pot turkey more often than you thought!
Print
Instant Pot Turkey Breast with Crispy Skin Recipe
- Prep Time: 10 minutes
- Cook Time: 35 minutes
- Total Time: 45 minutes
- Yield: 6 servings
- Category: Main Course
- Method: Instant Pot
- Cuisine: American
Description
This Instant Pot Turkey Breast recipe delivers a juicy, flavorful turkey breast cooked quickly with a blend of fresh herbs, paprika, and garlic. The pressure cooker method ensures tender meat, while optional broiling crisps up the skin beautifully. Perfect for a hearty American-style main course with an easy homemade gravy made from the drippings.
Ingredients
Turkey and Seasoning
- 7 lb bone-in skin-on turkey breast
- 3 tablespoons olive oil
- ¾ teaspoon paprika
- 2 teaspoons chopped poultry fresh herb mix (rosemary, sage, thyme)
- 1 teaspoon salt
- ½ teaspoon ground black pepper
Instant Pot Aromatics and Liquid
- 2 cups chicken broth
- 1 medium onion, chopped into large slices
- 4 garlic cloves
- 2 celery stalks
Gravy Thickener
- 2 tablespoons cornstarch
- ¼ cup cold water
Instructions
- Prepare Instant Pot: Add 2 cups chicken broth to the Instant Pot insert. Place the trivet inside. Arrange the sliced onions, garlic cloves, and celery stalks in the pot.
- Mix Seasoning: In a small bowl, combine olive oil, paprika, fresh herb mix, salt, and ground black pepper to make a flavorful rub.
- Prepare Turkey Breast: Wash the turkey breast and remove the gravy pocket. Pat dry with paper towels. Brush the turkey breast thoroughly with the olive oil seasoning mixture. Place the turkey breast on the trivet breast side up.
- Pressure Cook: Secure the Instant Pot lid and set the valve to sealing. Press 'manual' and set the timer for 35 minutes on high pressure.
- Release Pressure: When cooking completes and the Instant Pot beeps, press 'cancel/off' and let the pressure release naturally. This helps keep the turkey juicy.
- Remove Turkey: Open the lid carefully away from your face. Using a large fork, remove the turkey from the pressure cooker. Place on a cutting board or serving platter. Optionally, to crisp the skin, place turkey on a baking pan under the broiler at 440 ℉ until the skin is golden and crispy, rotating the pan as needed. Watch carefully.
- Make Gravy: Strain the pan drippings through a sieve to catch solids; press to extract all flavor. Measure out 2 cups of liquid and return to the Instant Pot insert. Whisk together cornstarch and cold water to make a slurry, add to the liquid, and sauté until the gravy thickens.
Notes
- Cook time does not include the time for the Instant Pot to come to pressure.
- Check turkey with a digital thermometer to ensure an internal temperature of at least 165 °F in the thickest part.
- 7 lb turkey breast fits well in a 6 qt Instant Pot Duo60 model.
- Save leftover broth for soups by cooling and freezing in airtight bags.
- If broiling the skin, monitor carefully to avoid burning and rotate the pan for even crisping.
Nutrition
- Serving Size: 1 serving
- Calories: 350 kcal
- Sugar: 1 g
- Sodium: 750 mg
- Fat: 18 g
- Saturated Fat: 4 g
- Unsaturated Fat: 13 g
- Trans Fat: 0 g
- Carbohydrates: 2 g
- Fiber: 0.5 g
- Protein: 45 g
- Cholesterol: 125 mg


Leave a Reply