There’s just something lovingly chaotic about baking with a little bit of everything on hand—that’s exactly what makes the Kitchen Sink Cookies Made Easy Recipe so magical. Crisp pretzels, melty chocolate, salty crunch, and colorful sprinkles all dancing together to create a cookie that’s a joy in every bite.

Jump to:
Why You'll Love This Recipe
I’ve tried many cookie recipes, but this Kitchen Sink Cookies Made Easy Recipe quickly became a favorite because it combines so many textures and flavors effortlessly. Plus, it’s the perfect recipe when you want a little fun and surprise in each cookie!
- Flavor Explosion: Every bite offers a mix of sweet, salty, and buttery yum that keeps you coming back for more.
- Super Customizable: You can swap in your favorite mix-ins, making this recipe truly your own creative project.
- Perfect Texture: The combination of soft centers and crispy edges with crunchy add-ins is downright addictive.
- Easy To Master: Despite the fancy name, this cookie comes together quickly and doesn’t require special baking skills.
Ingredients & Why They Work
Choosing the right ingredients lets each element shine while working together to create those perfectly balanced Kitchen Sink Cookies. Here’s why these staples are essential and some tips on picking the best ones:
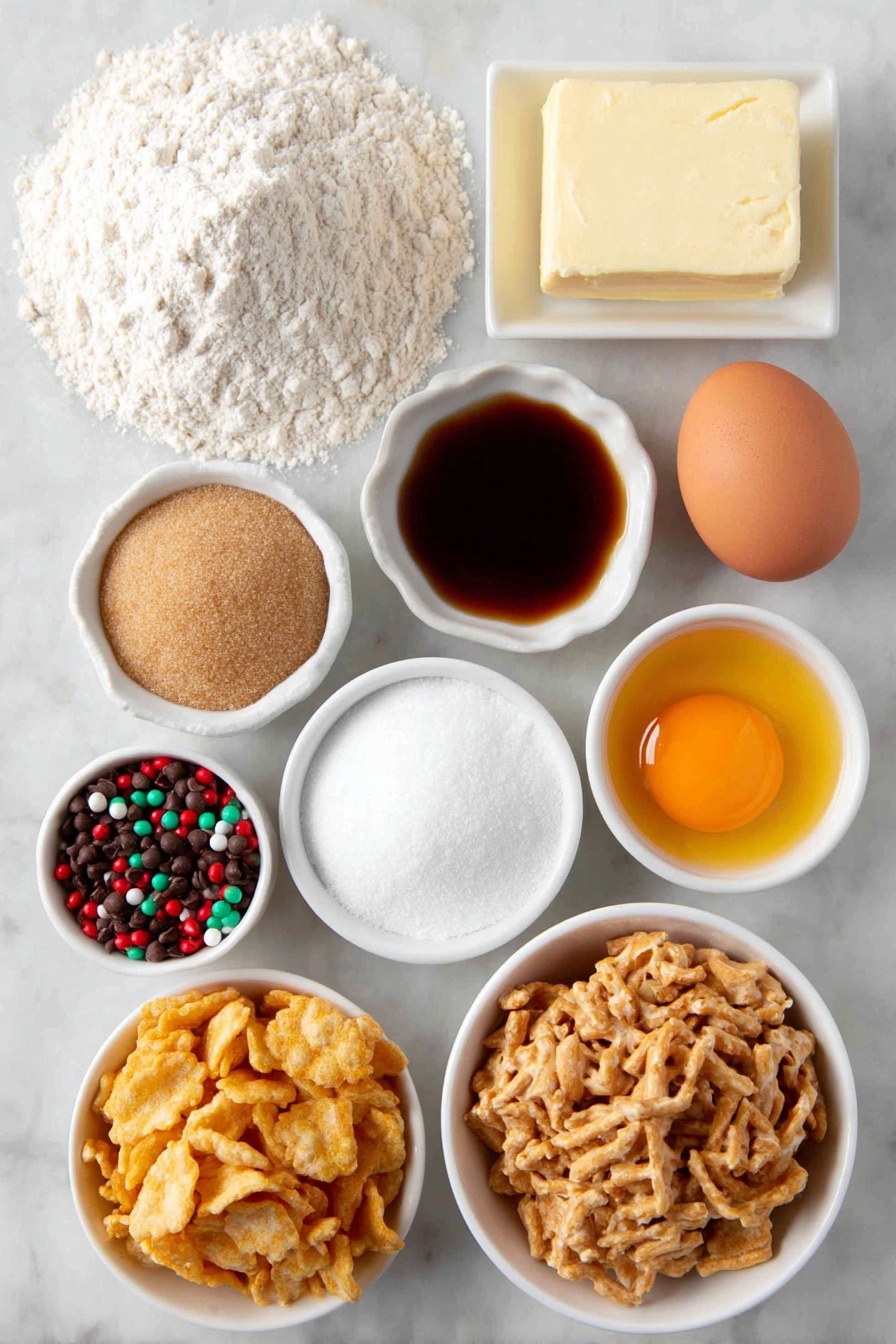
- All-purpose flour: The foundation that gives the cookies their structure without being too heavy.
- Baking soda: Helps the cookies rise just enough for a light, tender crumb.
- Cornstarch: Adds softness and a delicate texture, making each cookie pillowy.
- Salt: Balances the sweetness and enhances all the flavors.
- Unsalted butter: Room temperature is key here—soft but cool butter gives the best creaming and prevents spreading.
- Light brown sugar: Brings moisture and a hint of caramel flavor that deepens the cookie’s taste.
- Granulated sugar: Adds crispness and balances the softness from the brown sugar.
- Egg & egg yolk: The egg binds everything together, while the extra yolk adds richness and chew.
- Vanilla extract: The classic flavor enhancer that ties all the ingredients in harmony.
- Semi-sweet chocolate chips: Classic mix-in for melty pockets of chocolate—feel free to experiment with your favorites.
- Toffee bits or M&Ms: Adds sweetness and a crunchy surprise that’s fun to bite into.
- Crushed potato chips: The salty crunch gives that wonderful contrast to sweetness and softness.
- Chopped pretzels: More salt and crunch—trust me, it’s addicting.
- Holiday jimmies (sprinkles): These keep their shape and color after baking—perfect for festive flair without the mess.
Make It Your Way
One of the best parts about this Kitchen Sink Cookies Made Easy Recipe is how easy it is to customize. I often switch up the mix-ins depending on what I have on hand or the season—this is your playground, so don’t hesitate to make it truly yours.
- Variation: I love adding white chocolate chips and crushed peppermint around the holidays—the minty touch really elevates the cookie’s festive vibe.
- Dietary tweaks: You can swap in gluten-free flour blends, or use dairy-free butter alternatives if you want to accommodate allergies.
- Colorful fun: Swap holiday jimmies for rainbow sprinkles when you want a cheerful everyday version.
- Mix-ins galore: Consider toasted nuts, dried cranberries, or even mini marshmallows to keep each batch feeling fresh and exciting.
Step-by-Step: How I Make Kitchen Sink Cookies Made Easy Recipe
Step 1: Whisk Your Dry Ingredients Together
Start by preheating your oven to 350°F and lining your baking sheets with parchment paper. Then, whisk the flour, baking soda, cornstarch, and salt in a medium bowl until everything is evenly mixed. This ensures your cookies bake evenly without any surprise pockets of leavening.
Step 2: Cream Butter and Sugars Until Fluffy
In a large bowl, using a mixer, beat the softened butter with the brown sugar and granulated sugar for 2-3 minutes until light and creamy. This step is where magic begins—the air whipped into the butter helps create those tender cookie textures you love.
Step 3: Add Eggs and Vanilla for Richness
Next, beat in the egg, extra egg yolk, and vanilla extract for another 1-2 minutes until fluffy and light. Scrape down the bowl sides occasionally so everything blends well; it’ll make for a smoother batter and consistent cookies.
Step 4: Combine in Dry Ingredients Slowly
With your mixer on low speed, gradually add the dry ingredients to the wet bowl. Mix just until it's combined—overmixing at this stage can make cookies tough, and nobody wants that!
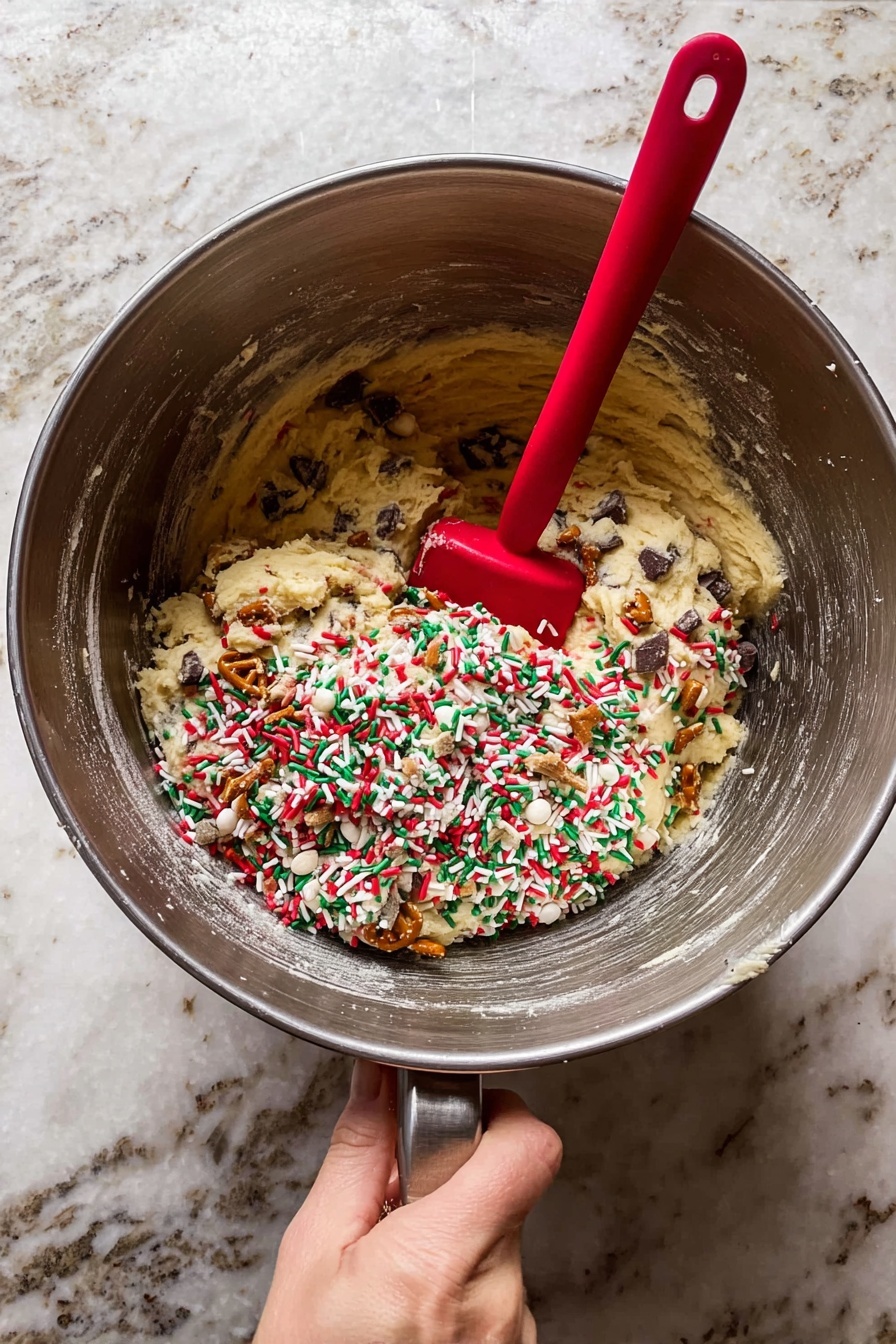
Step 5: Fold In Your Mix-Ins and Prep for Baking
Using a rubber spatula, gently fold in the chocolate chips, toffee bits, potato chips, pretzels, and sprinkles until evenly distributed. For thicker cookies, shape your dough balls into tall ovals instead of rounds when placing on the cookie sheet—it’s a little trick I swear by.
Step 6: Bake and Perfect the Shape
Bake for 10-12 minutes, until the edges are just golden and the tops look set but soft. Once out of the oven, take a large glass and swirl it gently around each warm cookie to create perfectly round edges, then press a few extra pieces of topping on top while the cookies are still warm. Let them cool on a rack for about 5 minutes before enjoying.
Top Tip
From baking dozens of batches, a few small tricks have really helped me nail this recipe every time. The devil’s in the details, so here are my best tips to make sure your Kitchen Sink Cookies turn out spectacular:
- Butter Temperature Matters: I’ve learned that leaving butter out for 30-60 minutes until cool to the touch (about 69°F) is the sweet spot—too warm and the cookies spread too much.
- Don’t Overmix: When adding the dry ingredients, mix just until combined. Overdoing it makes cookies harder instead of soft.
- Shape for Height: Rolling dough into ovals instead of balls makes a thick, chewy cookie you won’t be able to resist.
- Sprinkles Only Certain Types: Holiday jimmies work best here because they don’t bleed or melt into the dough, keeping that pretty sprinkle look.
How to Serve Kitchen Sink Cookies Made Easy Recipe

Garnishes
I personally love adding a few extra sprinkles or chocolate chips right on top of the cookie once they’re warm—it makes the presentation pop and adds that extra special touch. A tiny pinch of flaky sea salt on top can also bring out all the layers of flavor beautifully.
Side Dishes
These cookies pair wonderfully with a cold glass of milk, coffee, or even a scoop of vanilla ice cream for dessert. I’ve also served them alongside fresh fruit to balance out the indulgence, especially when hosting friends.
Creative Ways to Present
For holiday parties, arranging the cookies in a festive tin sorted by mix-in types adds charm. I’ve also rolled mini versions into bite-sized balls and popped them on skewers with marshmallows and pretzels—kids adored the playful presentation!
Make Ahead and Storage
Storing Leftovers
I store leftover cookies in an airtight container at room temperature, and they stay soft and delicious for up to five days. I like layering them between sheets of parchment paper to keep the toppings intact and the cookies from sticking together.
Freezing
For longer storage, freezing is a winner. I freeze unbaked dough balls on a tray first, then transfer them to a freezer-safe bag—this way they don’t stick. When baking from frozen, just add an extra minute or two to the bake time, and you get fresh cookies anytime you want.
Reheating
To warm up leftover cookies, I pop them in a low oven (around 300°F) for 5 minutes or microwave for about 15 seconds. This brings back the melty softness without making them mushy, perfect for that just-baked feeling.
Frequently Asked Questions:
Absolutely! I’ve swapped those out with crushed cornflakes or chopped nuts, and it still creates a satisfying crunch. Just choose something with a similar texture to keep that fun contrast.
Cornstarch gives the cookies extra tenderness and a soft, almost cake-like texture. It’s a small ingredient that makes a big difference—trust me on this one!
Starting with room temperature butter that’s cool to the touch helps a lot. Also, shaping dough into taller ovals, chilling the dough slightly before baking, and using parchment paper instead of greasing pans keeps the cookies thick and chewy.
Yes! You can mix the dough and store it in the fridge for up to 2 days. Just be aware the chips and mix-ins might lose a bit of crunch, but the flavor is still fantastic.
Final Thoughts
This Kitchen Sink Cookies Made Easy Recipe holds a cozy spot in my kitchen—the perfect blend of everything I love rolled into one bite. Whether you’re baking for friends, family, or just because, these cookies are a delight that brings smiles all around. I can't wait for you to try this recipe and make it your own—you’re going to love the fun mix of textures and flavors. Happy baking!
Print
Kitchen Sink Cookies Made Easy Recipe
- Prep Time: 15 minutes
- Cook Time: 12 minutes
- Total Time: 27 minutes
- Yield: 16 servings
- Category: Dessert
- Method: Baking
- Cuisine: American
Description
Kitchen Sink Cookies are a delightful medley of sweet and salty flavors packed into thick, chewy cookies. Loaded with chocolate chips, toffee bits, chopped pretzels, crushed potato chips, and festive holiday jimmies, these cookies offer an irresistible combination of textures and tastes perfect for any festive occasion or indulgent treat.
Ingredients
Dry Ingredients
- 2 ¼ cups 270g all-purpose flour
- 1 teaspoon baking soda
- 1 Tablespoon 8g cornstarch
- ½ teaspoon salt
Wet Ingredients
- ¾ cup 170g unsalted butter, room temperature
- ¾ cup 150g light brown sugar, packed
- ¼ cup 50g granulated sugar
- 1 egg, room temperature
- 1 egg yolk, room temperature
- 1 teaspoon vanilla extract
Mix-ins
- ½ cup semi-sweet chocolate chips (chopped chocolate or white chocolate chips can be used)
- ½ cup toffee bits or red & green M&Ms
- ¾ cup crushed potato chips
- ½ cup chopped pretzels
- ¼ cup holiday jimmies (not nonpareils)
Instructions
- Preheat oven and prepare baking sheets: Preheat your oven to 350°F and line baking sheets with parchment paper to prevent sticking.
- Whisk dry ingredients: In a medium bowl, whisk together the flour, baking soda, cornstarch, and salt until well combined.
- Cream the butter and sugars: In a large bowl, using a handheld or stand mixer fitted with the paddle attachment, beat the unsalted butter, light brown sugar, and granulated sugar together for 2-3 minutes until the mixture is light and creamy.
- Add the wet ingredients: Incorporate the egg, egg yolk, and vanilla extract into the butter mixture. Beat for 1-2 minutes until light and fluffy, scraping down the sides of the bowl as needed.
- Mix in the dry ingredients: With the mixer on low speed, gradually add the dry ingredient mixture and mix just until combined to avoid overmixing.
- Fold in the mix-ins: Using a rubber spatula, stir in the chocolate chips, holiday jimmies, toffee bits, crushed potato chips, and chopped pretzels until evenly distributed.
- Scoop and shape dough: Using a large cookie scoop or approximately a scant ¼ cup measure, drop dough onto prepared baking sheets. Roll each dough ball into a tall oval shape for thicker cookies.
- Bake the cookies: Bake in the preheated oven for 12 minutes, until the edges are slightly golden and the tops are just set.
- Finish the cookies: Immediately after removing from the oven, gently swirl the rim of a large glass around the outside of each warm cookie to create a perfect circle shape. Press extra toppings on top as desired. Let cookies cool on the baking sheets for 5 minutes then transfer to a wire rack to cool completely.
Notes
- Use room temperature butter that is cool to the touch (about 69°F) to prevent excessive spreading of the cookies.
- Use holiday jimmies for sprinkles because they maintain their shape and color without melting or bleeding into the dough during baking.
- Try different mix-ins such as white chocolate chips, red and green M&Ms, chocolate chunks, salted peanuts, or crushed peppermint for variation.
- You can make the dough ahead and store it covered in the fridge for up to 2 days; note that the chips may lose some crunchiness.
- Store baked cookies in an airtight container for up to 5 days or freeze for up to 2 months; thaw cookies uncovered before serving.
- Freeze cookie dough balls in a single layer then transfer to a freezer-safe bag; dough can be stored up to 3 months. Add 1-2 minutes extra baking time when baking from frozen.
Nutrition
- Serving Size: 1 cookie
- Calories: 220 kcal
- Sugar: 14 g
- Sodium: 150 mg
- Fat: 11 g
- Saturated Fat: 6 g
- Unsaturated Fat: 4 g
- Trans Fat: 0 g
- Carbohydrates: 28 g
- Fiber: 1 g
- Protein: 2 g
- Cholesterol: 35 mg


Leave a Reply