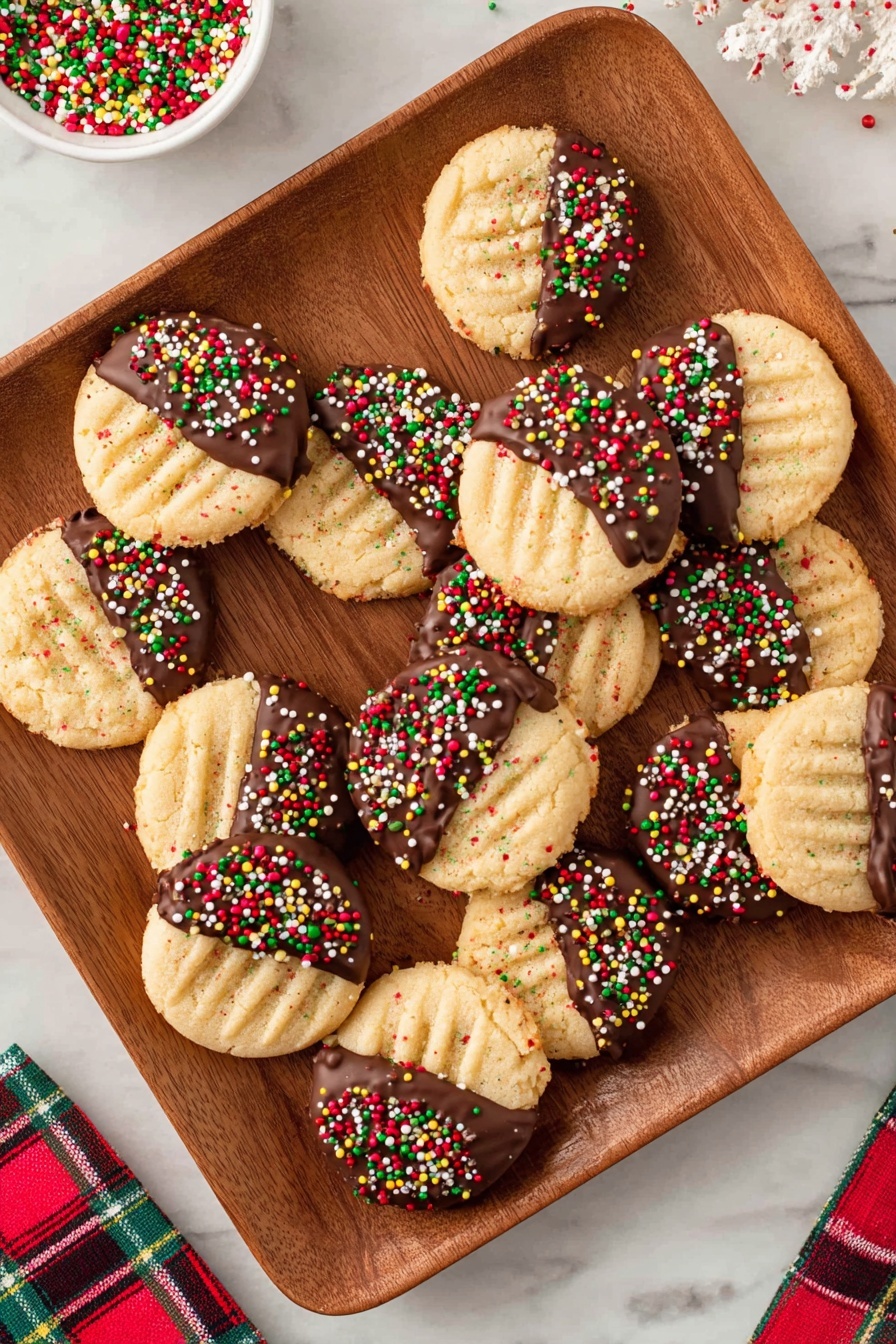
Nothing says holiday magic quite like the sweet, nutty aroma of fresh-baked peanut butter cookies dipped in glossy chocolate. This Peanut Butter Christmas Cookies with Chocolate Recipe brings that cozy, festive feeling right into your kitchen, delivering chewy, melt-in-your-mouth bites perfect for sharing (or sneaking a few when no one’s looking!).

Jump to:
- Why You'll Love This Recipe
- Ingredients & Why They Work
- Make It Your Way
- Step-by-Step: How I Make Peanut Butter Christmas Cookies with Chocolate Recipe
- Top Tip
- How to Serve Peanut Butter Christmas Cookies with Chocolate Recipe
- Make Ahead and Storage
- Frequently Asked Questions:
- Final Thoughts
- Peanut Butter Christmas Cookies with Chocolate Recipe
Why You'll Love This Recipe
I've tried a lot of peanut butter cookie recipes over the years, but this Peanut Butter Christmas Cookies with Chocolate Recipe stands out for its perfect balance of rich peanut butter flavor and festive chocolate dipped indulgence. It’s seriously the kind of treat that makes holiday baking feel joyful and rewarding.
- Easy to Make: The steps are straightforward, and you won’t need any fancy equipment beyond basics you already have in your kitchen.
- Perfect Holiday Flair: Dipping in melted chocolate and adding sprinkles makes these cookies look as festive as they taste.
- Customizable: Want to swap sprinkles for nuts or try different types of chocolate? It’s all up to you!
- Great for Gifting: They freeze well and store beautifully, so you can make a big batch early and still impress friends and family later.
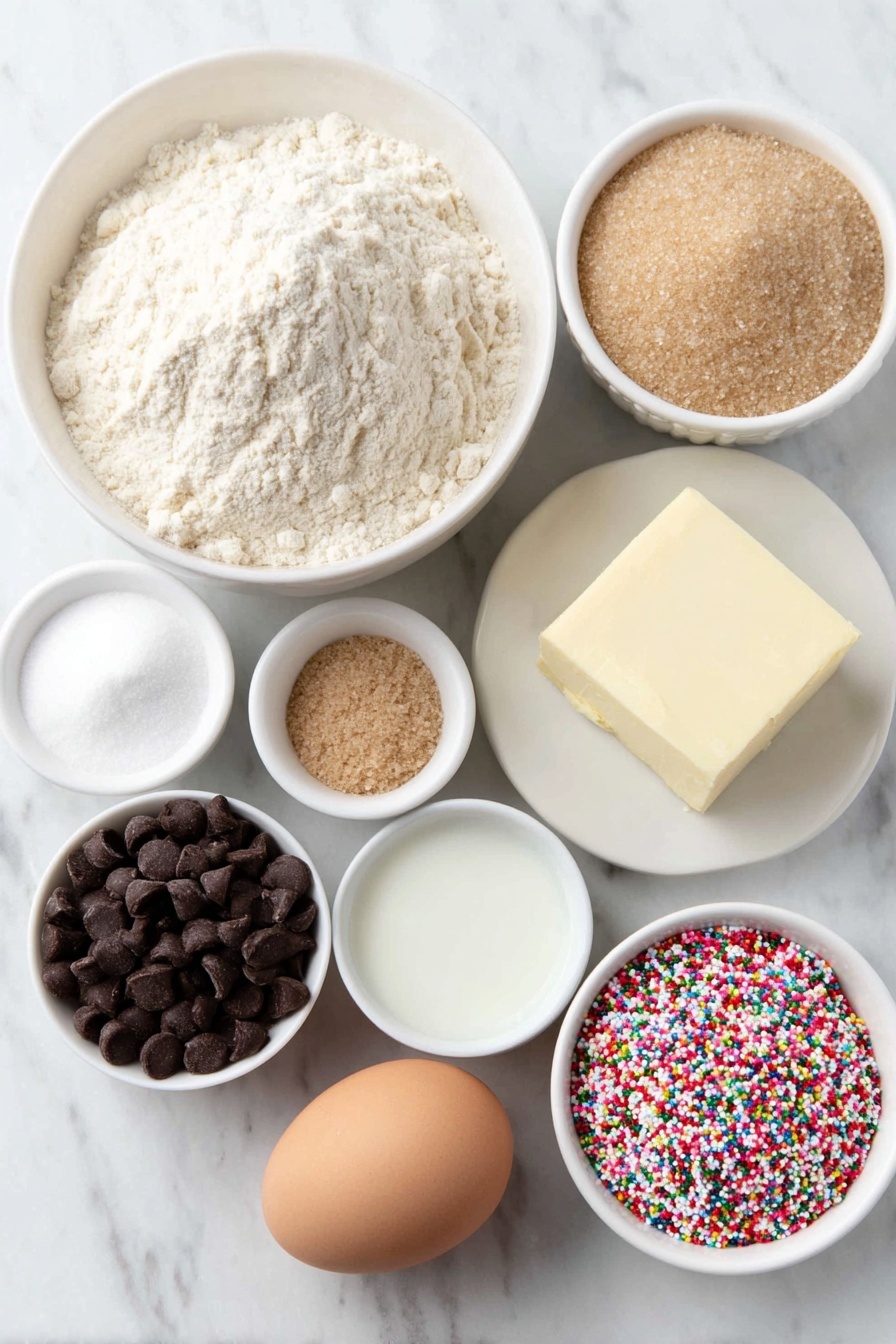
Ingredients & Why They Work
Every ingredient in this Peanut Butter Christmas Cookies with Chocolate Recipe comes together to create that lovely texture and flavor you remember from holiday cookie tins. Using creamy peanut butter adds softness and richness, while the combination of baking soda and powder helps the cookies rise just enough without losing that classic chewy bite.
- All-purpose flour: Provides structure to the dough but keeps the cookies tender when measured just right.
- Baking powder and baking soda: These leavening agents work together to ensure a light crumb and nice spread.
- Kosher salt: Enhances the sweet and nutty flavors, balancing the cookie perfectly.
- Unsalted butter: Room temperature butter creams smoothly with sugars, producing a tender, moist cookie base.
- Creamy peanut butter: The star of the show—adds intense peanut flavor without grittiness.
- Granulated and light brown sugar: Brown sugar adds chewiness and subtle caramel notes, while white sugar helps crisp the edges slightly.
- Egg: Binds everything together and helps with fluffiness.
- Vanilla extract: A little warmth and sweetness to deepen the flavor profile.
- Semi-sweet chocolate chips: Best for melting and dipping—it provides the perfect bittersweet contrast to the peanut buttery sweetness.
- Coconut or vegetable oil: Mixed into the melted chocolate for a smooth, glossy finish that hardens nicely when cooled.
- Holiday sprinkles: Adds festive color and that joyful crunch at the end!
Make It Your Way
What I love most about this Peanut Butter Christmas Cookies with Chocolate Recipe is how easy it is to switch things up without losing the cookie’s charm. Feel free to personalize the toppings and chocolate types to fit any holiday or craving.
- Variation: One year, I swapped holiday sprinkles for crushed peanuts on half the batch—it added such a delicious salty crunch that everyone requested those first!
- Diet-friendly swaps: For dairy sensitivities, I’ve successfully used vegan butter and dairy-free chocolate chips with excellent results.
- Seasonal twists: Try festive sprinkles for Halloween or Valentine's, or even drizzle white chocolate instead of dipping for a different look.
Step-by-Step: How I Make Peanut Butter Christmas Cookies with Chocolate Recipe
Step 1: Gather and Prep Your Ingredients
First things first, preheat your oven to 375°F and line a baking sheet with parchment paper. Make sure your butter and egg are at room temperature—this helps everything blend smoothly and gives you the best texture in the final cookie.
Step 2: Combine Dry Ingredients
In a medium bowl, whisk together the sifted all-purpose flour, baking powder, baking soda, and kosher salt. Sifting helps the dry ingredients mix evenly and prevents clumps—quick and worth the effort!
Step 3: Cream Butter, Peanut Butter & Sugars
Using a stand mixer or hand mixer, beat the softened butter, creamy peanut butter, granulated sugar, and brown sugar until the mixture is smooth and creamy. Patience here means you’ll get those soft, chewy cookies everyone loves. It usually takes about 2-3 minutes on medium speed.
Step 4: Add Egg and Vanilla
Mix in the egg and vanilla extract until the batter is light and fluffy. You’ll notice it gets a little lighter in color – that’s a good sign your cookie dough is coming together beautifully.
Step 5: Incorporate Dry Ingredients
Slowly add the flour mixture to the wet ingredients, mixing on low speed until combined. Scrape down the sides of your bowl to ensure everything is well incorporated. The dough will be soft but manageable.
Step 6: Shape and Press
Using a medium cookie scoop, drop dough balls onto the prepared baking sheet, spacing them at least 2 inches apart. Then, gently press each cookie with a fork, making a crisscross pattern—you’ll do two presses per cookie but be careful to keep their round shape.
Step 7: Bake and Cool
Bake for 10 to 12 minutes until the edges are just turning golden. Let the cookies cool on the baking sheet for about 5 minutes, then transfer them to a wire rack to cool completely—this step is important before chocolate dipping so the chocolate doesn’t melt off.
Step 8: Melt Chocolate and Dip
In a microwave-safe bowl, melt the semi-sweet chocolate chips in one-minute increments, stirring in between until smooth. Stir in the coconut or vegetable oil to give it a silky finish and help it set nicely.
Step 9: Decorate and Set
Dip each cookie halfway into the melted chocolate and place it back on parchment paper. Immediately sprinkle with your favorite holiday sprinkles. Let the cookies sit at room temperature for about an hour until the chocolate is fully set.
Top Tip
After several batches, I’ve learned that the key to getting those iconic fork crisscross marks is using a fork dipped temporarily in flour or sugar so it doesn’t stick to the dough. Also, waiting for cookies to cool before dipping avoids chocolate melting too thin and dripping off.
- Fork Pressing Made Easy: Lightly dust your fork with flour or sugar before pressing to keep the dough from sticking and keep a clean pattern.
- Chill Your Cookies: If your dough feels too soft, a quick 30-minute chill helps maintain the shape during baking.
- Melt Chocolate Slowly: Don’t rush melting chocolate; short bursts in the microwave with stirring will prevent burning.
- Use an Offset Spatula: When removing dipped cookies, an offset spatula helps keep the chocolate smooth and intact.
How to Serve Peanut Butter Christmas Cookies with Chocolate Recipe
Garnishes
I usually stick with classic holiday sprinkles because they bring vibrant color and a playful crunch. But nothing beats topping some with finely chopped roasted peanuts for a little salty-nutty texture that enhances the peanut butter flavor wonderfully.
Side Dishes
These cookies pair perfectly with a warm cup of spiced hot cocoa or a frothy eggnog. For a holiday party, I like to serve them alongside a cheese platter with nuts and dried fruits, balancing sweet and savory bites.
Creative Ways to Present
Once, I arranged these cookies in festive shapes on a large platter—think Christmas tree shape—and drizzled extra melted white chocolate over the top for a snowy effect. Edible gold dust or crushed candy canes also make for stunning presentation and an extra festive touch.
Make Ahead and Storage
Storing Leftovers
I store leftover cookies in an airtight container at room temperature, layering them between sheets of parchment paper to prevent sticking. They stay fresh and chewy for up to a week—perfect for snacking over several days or handing out as gifts.
Freezing
Since this recipe yields about 40 cookies, freezing is a game-changer. I freeze baked (and fully cooled) cookies between layers of parchment in airtight containers or resealable bags. They last up to 3 months and thaw quickly at room temperature.
Reheating
When I want to warm them up, a quick 10-second zap in the microwave revives that fresh-baked softness without melting the chocolate too much. Just be sure to watch them closely so they don’t get too hot.
Frequently Asked Questions:
Yes, you can use salted butter in this recipe. However, if you do, I recommend omitting the additional ½ teaspoon of kosher salt to keep the flavors balanced.
Certainly! Rolling the cookie dough balls in granulated sugar before baking adds a nice sparkle and crunch, but since the cookies are already dipped in chocolate and decorated with sprinkles, I usually skip it to avoid extra sweetness.
Yes, melting wafers work perfectly for dipping and might even melt a bit smoother than chips, making dipping easier. Just follow the same melting instructions.
Bake these peanut butter cookies for 10 to 12 minutes, until the edges start to turn golden and the cookies look set. Keep an eye on them to prevent overbaking, which can dry the cookies out.
Final Thoughts
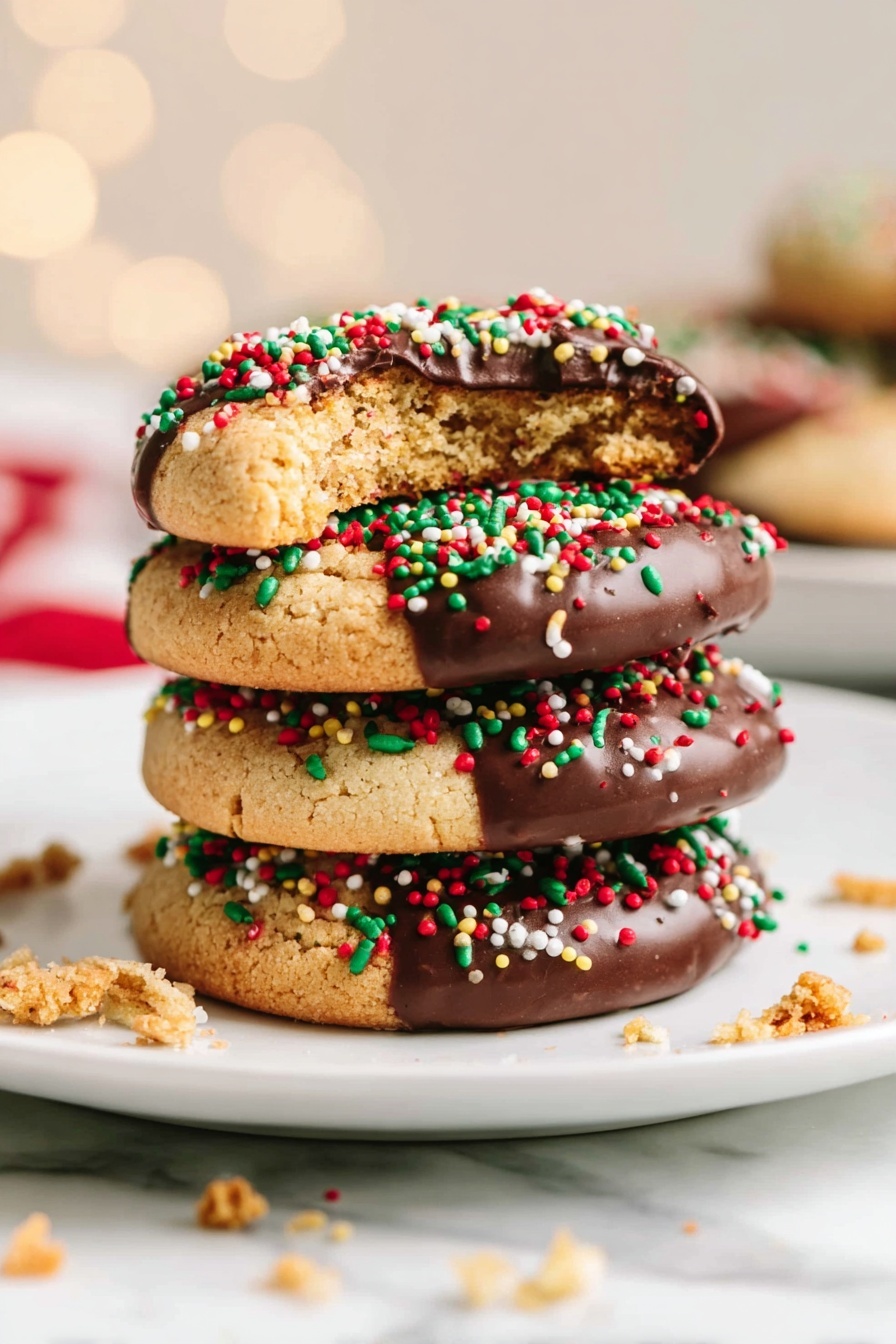
This Peanut Butter Christmas Cookies with Chocolate Recipe is one of those holiday staples that becomes a family favorite over time. The combo of chewy, nutty cookie and rich chocolate feels like a hug on a chilly evening. I’m confident once you try it, this recipe will earn a spot in your holiday tradition too—baking them is like spreading a little festive joy, one delicious bite at a time!
Print
Peanut Butter Christmas Cookies with Chocolate Recipe
- Prep Time: 20 minutes
- Cook Time: 12 minutes
- Total Time: 1 hour 20 minutes
- Yield: 40 cookies
- Category: Dessert
- Method: Baking
- Cuisine: American
Description
These Peanut Butter Christmas Cookies are a festive treat featuring a classic peanut butter cookie base dipped in melted semi-sweet chocolate and topped with holiday sprinkles. Soft, chewy, and decorated for the holidays, they make the perfect sweet snack or dessert for celebrations.
Ingredients
Dry Ingredients
- 1¼ cups all-purpose flour sifted
- ½ teaspoon baking powder
- ½ teaspoon baking soda
- ½ teaspoon kosher salt
Wet Ingredients
- ½ cup unsalted butter room temperature
- ½ cup creamy peanut butter
- ½ cup granulated sugar
- ½ cup light brown sugar packed
- 1 large egg room temperature
- ½ teaspoon vanilla extract
For Chocolate Dip and Decoration
- 2 cup semi-sweet chocolate chips
- 2 teaspoon coconut or vegetable oil
- 3 tablespoons holiday sprinkles
Instructions
- Prepare Oven and Baking Sheet: Preheat your oven to 375°F and line a large baking sheet with parchment paper to prevent sticking and ease cleanup.
- Mix Dry Ingredients: In a medium bowl, whisk together the sifted all-purpose flour, baking powder, baking soda, and kosher salt until evenly combined.
- Cream Butter and Sugars: Using a large bowl or stand mixer fitted with a paddle attachment, cream together the unsalted butter, creamy peanut butter, granulated sugar, and light brown sugar until the mixture is smooth and creamy.
- Add Egg and Vanilla: Mix in the large egg and vanilla extract until the batter becomes light and fluffy, ensuring good incorporation.
- Combine Dry and Wet Ingredients: Slowly add the dry ingredients to the wet mix, mixing until combined. Scrape down the sides as necessary to ensure everything is evenly mixed.
- Shape Cookies: Using a medium cookie scoop, portion the dough and place scoops onto the prepared baking sheet at least 2 inches apart to allow spreading.
- Press Cookies: Gently press each dough ball down with a fork, creating crisscross patterns by pressing twice per cookie, taking care to maintain the round shape.
- Bake Cookies: Bake the cookies in the preheated oven for 12 minutes until edges are set and slightly golden. Remove and transfer to a cooling rack to cool completely.
- Melt Chocolate: In a small bowl, melt the semi-sweet chocolate chips in the microwave, heating for 1 minute then stirring. Continue heating in 30-second intervals, stirring between each, until fully melted and smooth.
- Add Oil to Chocolate: Stir the coconut or vegetable oil into the melted chocolate to achieve a smooth, glossy consistency for dipping.
- Dip and Decorate: Dip each cooled cookie halfway into the melted chocolate, then place on parchment paper. Immediately sprinkle each dipped cookie with holiday sprinkles to decorate.
- Set the Chocolate: Allow the chocolate on the cookies to set by letting them rest at room temperature for 1 hour until firm.
Notes
- How To Store: Store cookies in an airtight container at room temperature for up to 7 days to maintain freshness.
- Butter Substitution: You can use salted butter instead of unsalted, but omit the ½ teaspoon kosher salt in the recipe as salted butter adds saltiness.
- Freezing: These cookies freeze well for up to 3 months when stored in an airtight container, perfect for batch prep and future enjoyment.
- Chocolate Alternatives: Melting wafers can be used instead of chocolate chips for the dip if preferred.
- Sugar Coating Option: Rolling cookie balls in granulated sugar before baking adds extra sweetness; however, the chocolate dip provides sufficient sweetness for most tastes.
- Variation Ideas: Top cookies with crushed peanuts alongside sprinkles for added crunch and flavor. Substitute festive mini M&Ms for sprinkles for a chocolaty crunch. For a sweet and salty twist, sprinkle sea salt on the chocolate before it sets.
- Chocolate Types: Use milk chocolate for a sweeter dip or dark chocolate for a richer flavor instead of semi-sweet chocolate chips.
- Holiday Adaptability: Customize the cookie topping with sprinkles themed for various holidays like Valentine’s Day, Easter, or Halloween to enjoy year-round.
Nutrition
- Serving Size: 1 cookie
- Calories: 150 kcal
- Sugar: 12 g
- Sodium: 80 mg
- Fat: 8 g
- Saturated Fat: 3 g
- Unsaturated Fat: 4 g
- Trans Fat: 0 g
- Carbohydrates: 18 g
- Fiber: 1 g
- Protein: 3 g
- Cholesterol: 25 mg


Leave a Reply